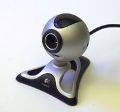
A webcam can be connected to a computer by following these straightforward steps:
- Take all the webcam components out of the box. Most webcam sets will come with an installation CD and USB connection that may or may not be attached to the actual camera itself.
- If you have an installation disc or CD, insert it into the computer and follow the installation steps on screen. If the installation steps do not pop up automatically, you will need to go to the 'My computer' section, usually found on the desktop, and click on the CD drive. This is usually drive E.
- If your camera does not come with an installation CD, this may be because the camera will be recognised by Windows when it is plugged in. If so, it will then be able to guide you through the installation process. If you do not have an installation CD, simply plug the camera in and follow the pop up steps.
- After you have installed the software, plug in the webcam into a USB drive. This may be at the back or side of the computer and looks like a small rectangle.
- Next, you need to place your webcam in a good location. Some webcams are designed with a small clip that can be attached to the top of a computer screen. On the other hand, you could use a stack of books or place the camera on a shelf just above the computer monitor screen.
- When you want to use the webcam in future, simple open the software which will probably be on your desktop, or can be found by clicking on the start menu and browsing for it.
